















































Charm necklaces have become a favourite jewellery project among DIY makers, hobbyists, and small craft businesses. From personalised gifts to fashion accessories, there are several ways to create unique charm necklaces depending on your materials, budget, and desired level of detail.
The most common methods include resin casting, clay modelling, and laser engraving. Each approach offers different advantages in terms of creativity, durability, production speed, and customisation options.
In this guide, we'll compare these three popular techniques, explain their pros and cons, and help you decide which method is best for creating professional-looking charm necklaces. For makers seeking greater precision and repeatability, laser engraving may offer the most versatile solution.

In this article:
- Method 1: Make a Charm Necklace with Resin
- Method 2: Make a Charm Necklace with Clay
- Method 3: Make a Charm Necklace with a Laser Engraver
- FAQs: Hot Questions about Making a Charm Necklace
Method 1: Make a Charm Necklace with Resin
Resin crafting is one of the most popular ways to create personalised charm necklaces. Using epoxy resin and silicone moulds, you can produce colourful, glossy jewellery pieces with embedded decorations and custom designs.
Resin charm necklaces are particularly suitable for handmade gifts, personalised accessories, themed jewellery collections, and DIY craft projects. Makers often embed dried flowers, glitter, miniature charms, photos, shells, or metallic flakes directly into the resin to create unique pieces that would be difficult to achieve with traditional metalworking methods.
Materials and Tools Needed
- Epoxy resin kit
- Silicone pendant or charm moulds
- Necklace chains or cords
- Jump rings and jewellery clasps
- Mixing cups and stirring sticks
- Pigments, glitter, dried flowers, or decorative fillers
- Protective gloves and a mask
- Heat gun or small torch (optional)
- Drill or jewellery pin vice (optional)
- Sandpaper or polishing tools (optional)
Safety note
Work in a well-ventilated area and follow the resin manufacturer's safety instructions. Wear gloves and a suitable mask when handling uncured resin.
Steps to Make a Charm Necklace with Resin
- Prepare the workspace: Cover the work surface and ensure the area is clean, level, and well ventilated.
- Mix the resin: Combine the epoxy resin and hardener according to the manufacturer's instructions and stir thoroughly.
- Add decorative elements: Mix in pigments, glitter, dried flowers, metallic flakes, charms, or other decorative fillers if desired.
- Pour resin into the mould: Carefully pour the resin mixture into the silicone charm mould and remove air bubbles using a heat gun or torch if needed.
- Allow the resin to cure: Let the resin fully harden according to the recommended curing time.
- Remove and finish the charm: Demould the resin charm and sand or polish the edges if necessary for a smoother finish.
- Assemble the necklace: Attach jump rings, clasps, and necklace chains or cords to complete the charm necklace.
Pros and Cons of Making a Charm Necklace with Resin
Pros
- Highly customisable
- Glossy decorative finish
- Ideal for embedded designs
- Beginner-friendly for DIY jewellery making
Cons
- Requires curing time
- Needs resin safety precautions and good ventilation
- Additional sanding or polishing may be needed to remove imperfections
When resin is the best choice
Choose resin if you want colourful, glossy charms with embedded decorations and you are making a small number of personalised pieces by hand.
For larger batches, precise text or logo engraving, or repeatable production, a laser engraver is usually the more efficient option because it avoids curing time and delivers consistent results across multiple charms.
Method 2: Make a Charm Necklace with Clay
Clay crafting is a creative and beginner-friendly way to make personalised charm necklaces. Unlike resin, which relies on moulds and casting, clay allows you to sculpt completely custom shapes by hand using polymer clay, air-dry clay, or ceramic clay.
Clay charm necklaces are popular for handmade jewellery, personalised gifts, aesthetic accessories, and artistic craft projects. With a wide range of colours, textures, and finishing techniques available, clay makes it easy to create playful, minimalist, vintage-inspired, or highly decorative designs that reflect your personal style.
Materials and Tools Needed
- Polymer clay or air-dry clay
- Clay sculpting tools
- Rolling pin or acrylic roller
- Cookie cutters or shaping moulds (optional)
- Jump rings and jewellery clasps
- Necklace chains or cords
- Oven (for polymer clay)
- Paint, glaze, or varnish (optional)
- Sandpaper or polishing tools (optional)
Steps to Make a Charm Necklace with Clay
- Prepare the clay: Knead and soften the clay until it becomes smooth and easy to shape.
- Create the charm shape: Roll out the clay and cut or sculpt the desired pendant or charm designs.
- Add decorative details: Use sculpting tools to create textures, patterns, names, initials, or decorative elements on the clay surface.
- Create the attachment hole: Make a small hole for jump rings or necklace fittings before baking or drying the clay.
- Bake or dry the clay: Cure the clay according to the manufacturer's instructions if using polymer clay, or allow air-dry clay to harden completely.
- Finish the surface: Sand, glaze, paint, or polish the charm if a refined finish is desired.
- Assemble the necklace: Attach jump rings, clasps, and necklace chains or cords to complete the charm necklace.
Pros and Cons of Making a Charm Necklace with Clay
Pros
- Beginner-friendly and easy to learn
- Highly customisable
- Affordable materials and tools
- Ideal for artistic handmade jewellery
- Excellent for creating unique shapes and textures
Cons
- Clay may crack if not handled or cured properly
- Some clay types require baking time
- Fine details can be difficult to reproduce consistently
- Durability varies depending on the clay material used
When Clay Is the Best Choice
Clay is an excellent option for makers who enjoy handcrafting unique jewellery pieces and experimenting with shapes, textures, and artistic designs. It offers more creative freedom than resin when creating three-dimensional charms.
However, if you need highly detailed text, logos, intricate patterns, or consistent results across multiple pieces, a laser engraver provides greater precision and repeatability than hand-sculpted clay designs.
Method 3: Make a Charm Necklace with a Laser Engraver
Using a laser engraver is one of the most precise and efficient ways to create personalised charm necklaces. Unlike resin casting or hand-sculpted clay, laser engraving uses a digital design file to cut and engrave jewellery components with exceptional accuracy and consistency.
This method is ideal for personalised necklaces, engraved pendants, layered jewellery designs, name charms, and small-batch jewellery production. It also allows makers to create intricate artwork, logos, initials, and detailed text that would be difficult to reproduce by hand.
For hobbyists, NOTHS sellers, and small jewellery businesses in the UK, laser engraving offers a professional way to create repeatable designs while maintaining high-quality results.
Materials and Tools Needed
- Laser engraver or laser cutter
- Wood, acrylic, leather, stainless steel, titanium, or coated metal blanks
- Vector design software
- Necklace chains or cords
- Jump rings and jewellery clasps
- Sandpaper or polishing tools
- Paint or colour-filling materials (optional)
- Ventilation system or air assist
- Protective eyewear
- Dust mask (optional)
Steps to Make a Charm Necklace with a Laser Engraver
- Create the necklace design: Design the charm shape, engraved text, logo, or decorative artwork using vector software.
- Prepare the material: Position the material on the laser workspace and ensure proper alignment.
- Adjust the laser settings: Set the appropriate power, speed, and engraving parameters based on the material.
- Cut and engrave the charm: Start the engraving process to cut the pendant shape and engrave detailed designs.
- Clean and finish the surface: Remove residue and apply paint filling or a protective finish if desired.
- Assemble the necklace: Attach jump rings, clasps, and chains to complete the finished necklace.
Pros and Cons of Making a Charm Necklace with a Laser Engraver
Pros
- Exceptional engraving precision
- Fast production speed
- Ideal for personalised jewellery
- Suitable for batch production
- Consistent results across multiple pieces
- Supports complex artwork, logos, and text
- Compatible with a wide range of jewellery materials
Cons
- Requires a laser engraver and design software
- Some materials require testing and optimisation
- Certain materials may need additional finishing
Why a Laser Engraver Is the Best Choice for Charm Necklaces
Compared with resin and clay, laser engraving offers the best combination of precision, efficiency, and scalability.
| Method | Detail Quality | Production Speed | Repeatability | Suitable for Batch Production |
|---|---|---|---|---|
| Resin | Medium | Slow | Medium | Limited |
| Clay | Medium | Slow | Low | Limited |
| Laser Engraving | High | Fast | Excellent | Excellent |
If your goal is to create professional-quality jewellery, personalised gifts, or products for sale, laser engraving is often the most practical long-term solution.
Recommended Laser Engraver for Charm Necklace Projects: LaserPecker LP5
The LaserPecker LP5 is designed for makers who need high-precision engraving and broad material compatibility for jewellery making and personalised accessory production.
Featuring a powerful 20W Fibre + 20W Diode Dual-Laser System, the LP5 can engrave both metals and non-metals commonly used in charm necklace production, including stainless steel, titanium, brass, acrylic, leather, and wood.
-
20W Fibre + 20W Diode Dual-Laser System
Combines fibre and diode laser technologies, allowing one machine to process a wide variety of jewellery materials. -
High-Speed Galvo Engraving up to 10,000 mm/s
Quickly engraves names, logos, decorative patterns, and personalised designs while maintaining excellent detail. -
0.0027 mm Engraving Precision
Produces sharp text, intricate artwork, and clean edges on small jewellery surfaces. -
120 × 160 mm Working Area
Suitable for engraving multiple pendants, charms, tags, and accessories in a single session. -
Expandable to 160 × 300 mm
The optional Slide Extension supports larger projects and more efficient batch production. -
Rotary Extension Compatibility
Supports rings, bracelets, tumblers, and other curved objects. -
Wide Material Compatibility
Compatible with stainless steel, titanium, brass, acrylic, leather, wood, coated metals, and many other materials used in jewellery production.
Safety and Indoor Use for UK Makers
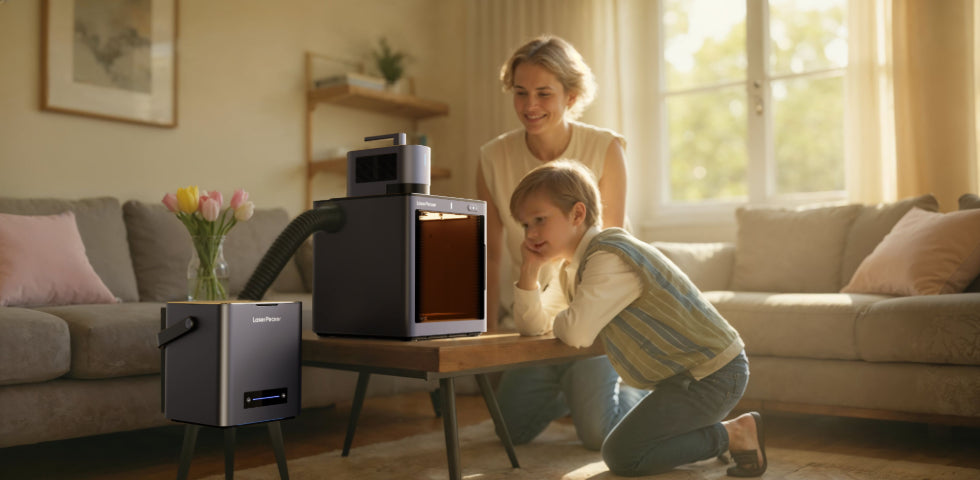
For users in the UK, the LaserPecker LP5 can be paired with the LaserPecker LP5 Safety Enclosure to achieve Class 1 Laser Safety, making it a safer solution for home workshops, studios, and small business environments.
For improved indoor air quality, the LP5 can also be used with the LaserPecker Desktop Smoke Purifier, which helps filter smoke, odours, and airborne particles generated during engraving and cutting. This makes indoor operation cleaner and more comfortable, particularly in compact workshop spaces commonly found in UK homes.
FAQs: Hot Questions about Making Charm Necklaces
Q1: What Is the Best Chain for a Charm Necklace?
Cable chains and belcher chains are among the most popular choices for charm necklaces because they allow charms to be attached easily at different points along the chain.
These chain styles offer excellent durability, flexibility, and support for multiple charms while maintaining a balanced appearance.
Q2: How Many Charms Should a Charm Necklace Have?
There is no strict rule regarding the number of charms.
Minimalist charm necklaces often feature one or two pendants, while statement pieces may include several charms that reflect personal interests, milestones, or memories.
The ideal number depends on the necklace length and overall design style.
Q3: What Is the Best Material for a Custom Charm Necklace?
Popular materials include:
- Stainless steel
- Sterling silver
- Gold-filled metal
- Acrylic
- Leather
- Wood
For laser-engraved charm necklaces, stainless steel, anodised aluminium, acrylic, and leather are particularly popular because they produce sharp, detailed engraving results.
Q4: Can You Make and Sell Charm Necklaces from Home?
Yes. Many UK-based makers and small businesses sell handmade charm necklaces through online marketplaces, social media shops, craft fairs, and independent websites.
For those producing personalised jewellery in larger quantities, laser engraving can significantly improve production efficiency and design consistency.
Q5: What Is the Best Way to Personalise a Charm Necklace?
Adding names, initials, dates, coordinates, handwritten messages, or custom artwork are some of the most popular personalisation options.
While resin and clay allow creative decoration, laser engraving offers the highest level of precision for detailed text, logos, and permanent markings.
Q6: Is a Laser Engraver Worth It for Making Charm Necklaces?
If you regularly create personalised jewellery, a laser engraver can be a worthwhile investment.
Machines such as the LaserPecker LP5 allow makers to engrave detailed designs on stainless steel, acrylic, leather, wood, and other jewellery materials with excellent accuracy and repeatability.
When paired with the LaserPecker LP5 Safety Enclosure, the system achieves Class 1 Laser Safety, making it suitable for many home workshop environments. For indoor use, the LaserPecker Desktop Smoke Purifier can help filter smoke and odours generated during engraving.
Conclusion
There are several ways to make a charm necklace, each suited to different creative styles, budgets, and production needs. Resin and clay are excellent options for handmade jewellery projects and artistic experimentation, while laser engraving offers greater precision, consistency, and personalisation.
For hobbyists, NOTHS sellers, and small jewellery businesses across the UK, laser engraving provides an efficient way to create custom charm necklaces with professional-quality detail. Whether you're making personalised gifts, fashion accessories, or jewellery collections, the LaserPecker LP5 offers a versatile solution for producing high-quality designs across a wide range of materials.





