















































Custom belts are a practical fashion accessory that can be personalised for everyday wear, gifts, branding, or craft projects. Today, makers can create custom belts using traditional handcrafting, decorative embroidery, or modern laser engraving techniques.
Each method offers different benefits in terms of design flexibility, production speed, durability, and customisation options. While handcrafting and embroidery remain popular for small-scale projects, laser engraving provides greater precision, consistency, and creative freedom for detailed belt designs.
In this guide, we'll compare three common methods, their advantages and limitations, and help you choose the best approach for your project.

In this article:
- Method 1: Make a Custom Belt via Handcrafting
- Method 2: Make a Custom Belt via Embroidery
- Method 3: Make a Custom Belt via Laser Engraving
- FAQs: Hot Questions about Making a Custom Belt
Method 1: Make a Custom Belt via Handcrafting
Handcrafting is one of the most traditional ways to create a custom belt. It is particularly popular among leatherworking enthusiasts, DIY makers, and crafters who want complete control over the design process. Whether you're making a personalised leather belt for everyday wear, a handmade gift, or a costume accessory, this method allows for extensive customisation of size, buckle style, stitching, and decorative elements.
While handcrafting offers a rewarding creative experience, it requires patience and careful attention to detail. Producing consistent results can also become challenging when making multiple belts.
Materials and Tools Needed
- Leather strap, fabric strap, or webbing material
- Belt buckle
- Hole punch or leather punch
- Utility knife or leather cutter
- Ruler or measuring tape
- Edge beveler or sandpaper
- Needle and thread or rivets (optional)
- Leather dye, paint, or finishing products (optional)
- Protective gloves
Steps to Make a Custom Belt via Handcrafting
-
Step 1: Measure the Required Belt Length
Measure the wearer's waist or use an existing belt as a reference. Accurate measurements help ensure a comfortable fit and reduce material waste. -
Step 2: Cut the Belt Strap
Cut the leather or fabric strap to the desired width and length using a sharp utility knife or leather cutter. A straight, clean cut will improve the overall appearance of the finished belt. -
Step 3: Shape and Finish the Edges
Round the tip of the belt if desired and smooth the edges using sandpaper or an edge beveler. This creates a more professional finish and improves comfort during use. -
Step 4: Create Buckle and Adjustment Holes
Use a leather punch to create the buckle attachment hole and a series of adjustment holes. Even spacing helps maintain a neat appearance. -
Step 5: Attach the Buckle
Secure the buckle using rivets, stitching, snaps, or screws, depending on the belt design and preferred construction method. -
Step 6: Add Personalised Details
Customise the belt with decorative stitching, hand stamping, painting, carving, or leather dye. This stage allows makers to create a truly personalised belt design. -
Step 7: Apply a Protective Finish
Finish the belt with a leather conditioner or protective coating to improve durability and maintain its appearance over time.
Pros and Cons of Making a Custom Belt via Handcrafting
Pros:
- Beginner-friendly and accessible
- Low equipment investment
- Suitable for one-off personalised projects
- Full control over materials and design details
Cons:
- Time-consuming compared with machine-assisted methods
- Requires manual accuracy and craftsmanship
- Difficult to achieve consistent results across multiple belts
- Complex decorative patterns can be challenging to create by hand
Method 2: Make a Custom Belt via Embroidery
Embroidery is a popular technique for creating personalised belts featuring names, logos, decorative patterns, monograms, or traditional motifs. It combines textile craftsmanship with creative design, making it an excellent option for fashion accessories, handmade gifts, western-style belts, and custom apparel projects.
One of the main advantages of embroidery is its ability to introduce colour, texture, and visual detail that cannot easily be achieved through basic belt construction. However, embroidered designs typically require more production time and may show signs of wear after extended use, particularly on frequently worn belts.
Materials and Tools Needed
- Leather belt strap, canvas belt, or fabric webbing
- Embroidery machine or embroidery needles
- Embroidery thread
- Belt buckle
- Scissors
- Measuring tape and ruler
- Embroidery stabiliser (optional)
- Fabric marker or chalk
- Leather punch or hole punch
- Protective gloves (optional)
Steps to Make a Custom Belt via Embroidery
-
Step 1: Prepare the Belt Material
Measure and cut the leather, canvas, or fabric strap to the desired length and width. Accurate measurements help ensure a comfortable fit and proper alignment of the embroidered design. -
Step 2: Create the Embroidery Design
Sketch, digitise, or select the pattern, name, logo, or artwork you would like to add. Planning the design in advance helps achieve a cleaner final result. -
Step 3: Secure the Material
Place the belt strap into an embroidery hoop or machine frame to keep the material stable throughout the stitching process. -
Step 4: Embroider the Design
Stitch the design manually or with an embroidery machine. Different thread colours and stitch styles can be combined to create unique decorative effects. -
Step 5: Trim and Clean the Threads
Remove any loose threads and tidy the embroidered area to improve the overall appearance. -
Step 6: Attach the Belt Buckle
Install the buckle and create adjustment holes using a leather punch or hole punch tool. -
Step 7: Apply Final Finishing
Apply edge finishing or a protective treatment if required to improve durability and maintain the belt's appearance.
Pros and Cons of Making a Custom Belt via Embroidery
Pros:
- Ideal for personalised names, logos, and decorative artwork
- Supports colourful and visually striking designs
- Suitable for fashion-focused projects
- Offers a handcrafted, premium appearance
Cons:
- More time-consuming than many modern customisation methods
- Thread may fade, fray, or wear over time
- Detailed designs often require embroidery experience
- Embroidery machines can increase equipment costs
- Complex artwork may be difficult to reproduce consistently across multiple belts
Method 3: Make a Custom Belt via Laser Engraving
Laser engraving is one of the most precise and efficient methods for creating a custom belt. Unlike handcrafting or embroidery, a laser engraver uses a digital design file to produce highly detailed patterns, personalised names, logos, monograms, and decorative artwork with exceptional accuracy and consistency.
This method is particularly suitable for personalised leather belts, branded accessories, fashion products, cosplay props, and small-business customisation projects. It allows makers to produce intricate designs quickly while reducing manual effort and maintaining consistent results across multiple belts.
For UK makers, laser engraving is especially attractive for home workshops and small craft businesses because it combines professional-quality results with efficient production workflows.
Materials and Tools Needed
- Laser engraver
- Leather belts, faux leather belts, canvas belts, or coated fabric straps
- Vector design software
- Belt buckle and hardware
- Masking tape (optional)
- Leather conditioner or finishing oil
- Ventilation or fume extraction system
- Protective eyewear
Steps to Make a Custom Belt via Laser Engraving
-
Step 1: Create the Belt Design
Design names, logos, decorative patterns, or custom artwork using vector design software. Popular file formats include SVG and DXF. -
Step 2: Prepare the Belt Material
Place the belt onto the engraving workspace and ensure it is properly aligned before processing. -
Step 3: Adjust the Laser Settings
Configure engraving power, speed, and resolution according to the material type and desired engraving depth. -
Step 4: Engrave the Belt Surface
Start the engraving process and allow the laser to permanently mark the design onto the material. -
Step 5: Clean and Finish the Belt
Remove any engraving residue and apply leather conditioner or a protective finish if required. -
Step 6: Install the Belt Hardware
Attach the buckle and make any final adjustments to the belt holes if necessary.
Pros and Cons of Making a Custom Belt via Laser Engraving
Pros:
- Exceptional engraving precision
- Permanent and wear-resistant markings
- Fast customisation process
- Ideal for names, logos, and detailed artwork
- Excellent repeatability for small-batch production
- Minimal manual labour compared with traditional methods
Cons:
- Requires a laser engraver and design software
- Some materials may require testing to optimise settings
- Larger belts may need repositioning during processing
Recommended Laser Engraver for Custom Belt Projects: LaserPecker LP2 Plus
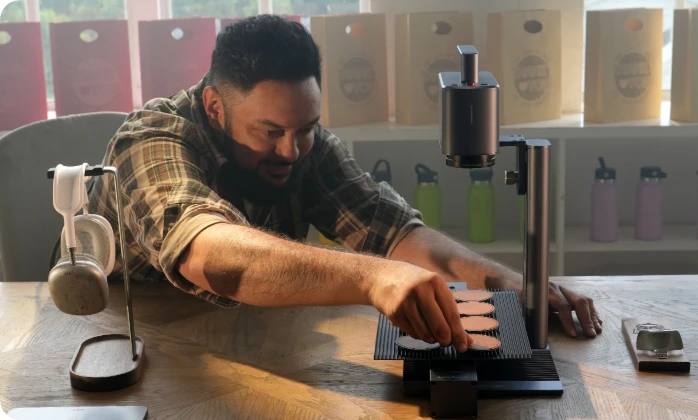
For makers who want professional engraving quality without investing in large workshop equipment, the LaserPecker LP2 Plus offers an excellent balance of portability, speed, and precision.
Its compact galvo-based design makes it well suited for engraving personalised leather belts, fashion accessories, branded products, and gift items. Compared with handcrafting and embroidery, laser engraving allows users to create cleaner details and repeat complex designs with significantly greater consistency.
For users concerned about workshop safety, the LP2 Plus can be paired with the LaserPecker Standard Enclosure to achieve Class 1 Laser Safety, making it a more suitable solution for home workshops and indoor creative spaces. For additional comfort during indoor operation, it can also be used with the LaserPecker Desktop Smoke Purifier, which helps filter fumes and odours generated during engraving and cutting processes.
-
10W 450nm Blue Diode Laser
Suitable for engraving leather, faux leather, wood, cardboard, bamboo, coated metals, paper, and many other craft materials. -
High-Speed Galvo Engraving up to 600 mm/s
Enables faster production of personalised belts and improves efficiency for small-batch orders. -
0.05 mm Compressed Laser Spot
Produces sharper lines and cleaner engraving details on leather and coated materials. -
100 × 100 mm Working Area
Provides ample space for names, logos, decorative artwork, and individual belt sections. -
Preview Positioning System
Red-light positioning helps users align engraving areas accurately before processing. -
LaserPecker Design Space Software Compatibility
Supports image import, text editing, and vector engraving workflows on both mobile devices and computers. -
Compact and Portable Design
Ideal for home studios, craft fairs, pop-up markets, and mobile customisation services. -
Wide Material Compatibility
Compatible with leather, faux leather, wood, bamboo, cardboard, coated metals, acrylic, and many other maker materials.
FAQs: Hot Questions about Making a Custom Belt
Q1: How Do I Measure the Right Size for a Custom Belt?
The most accurate method is to measure an existing belt that fits comfortably. Measure from the buckle fold to the hole used most often. This measurement will usually correspond to the centre adjustment hole on your new custom belt.
Q2: What Is the Best Material for a Personalised Belt?
Leather remains one of the most popular choices because it is durable, attractive, and suitable for stamping, painting, embroidery, and laser engraving. Faux leather and canvas belts are also good options for lightweight or budget-friendly projects.
Q3: What Kind of Paint Works Best on a Leather Belt?
Acrylic leather paint is generally the best choice. Unlike standard acrylic paints, it is formulated to flex with the leather surface, helping prevent cracking and peeling over time.
Q4: Can Beginners Customise a Belt at Home?
Yes. Beginners can personalise belts using simple leatherworking tools, paint, stamps, embroidery, or laser engraving equipment. Laser engravers are particularly beginner-friendly because digital designs can be engraved accurately with minimal manual skill.
Q5: How Can I Add a Name or Logo to a Leather Belt?
Names, initials, logos, and decorative patterns can be added through stamping, carving, painting, embroidery, or laser engraving. Laser engraving is often preferred because it supports custom fonts, vector graphics, and highly detailed artwork while producing permanent results.
Q6: Is Laser Engraving Good for Personalised Leather Belts?
Yes. Laser engraving is one of the most effective methods for creating personalised leather belts. Machines such as the LaserPecker LP2 Plus can produce precise details, permanent markings, and professional-quality designs with excellent consistency.
Q7: How Long Does It Take to Make a Custom Belt?
The production time depends on the method used. A simple handcrafted belt may take one to two hours, while embroidery projects can require significantly longer. Laser engraving is typically the fastest option for adding personalised names, logos, and decorative artwork.
Q8: Does Laser Engraving Damage Leather?
When the correct settings are used, laser engraving does not damage leather. Testing the material beforehand and adjusting power and speed settings appropriately helps create clean, detailed engravings without excessive burning.
Conclusion
There are several ways to make a custom belt, from traditional handcrafting techniques to modern engraving methods. Handcrafting offers a unique handmade appeal, while embroidery is well suited to colourful decorative designs. For most makers, hobbyists, and small businesses in the UK, laser engraving provides the best combination of precision, efficiency, and customisation.
It enables detailed personalisation on leather and other belt materials while maintaining consistent results. Whether you're creating personalised belts, handmade gifts, or custom fashion accessories, the LaserPecker LP2 Plus offers a practical solution for achieving professional-quality engraving with ease.





