















































Gift cards are a popular choice for birthdays, Christmas, weddings, and other special occasions across the UK. While slipping a gift card into a standard envelope is convenient, a handmade gift card holder creates a more personalised and memorable presentation.
There are several ways to make a gift card holder, ranging from simple paper crafts to durable wooden designs. Depending on your budget, tools, and crafting experience, you can use a Cricut machine, sewing machine, hand tools, or a laser cutter. Each method offers different levels of customisation, production speed, and finishing quality.
In this guide, we'll compare four popular gift card holder making methods, explore their pros and cons, and show why laser cutting has become one of the easiest and most versatile options for creating professional-looking gift card holders at home or in a small workshop.

In this article:
Method 1: Make a Paper Gift Card Holder with Cricut
A Cricut machine is one of the most popular tools for creating custom paper gift card holders. It can cut cardstock with excellent accuracy, helping UK crafters produce clean folds, intricate designs, and professional-looking results without the need for manual cutting.
Paper gift card holders are ideal for birthdays, Christmas, weddings, graduations, and seasonal events. They are inexpensive to make and offer plenty of opportunities for personalisation through colours, printed messages, ribbons, and decorative embellishments.
Materials and Tools Needed
- Cricut cutting machine
- Cardstock or craft paper
- Cricut Design Space software
- Cutting mat
- Glue or double-sided tape
- Ribbons, stickers, or decorative accessories (optional)
Steps to Make a Paper Gift Card Holder with Cricut
1. Create or Upload a Template
Choose a gift card holder template in Cricut Design Space or upload your own custom design.
2. Load the Cardstock
Place the cardstock securely on the cutting mat and insert it into the Cricut machine.
3. Cut the Design
Start the cutting process and allow the machine to cut all shapes, slots, and fold lines automatically.
4. Fold and Assemble
Carefully fold the template along the score lines and secure the structure using glue or double-sided tape.
5. Personalise the Holder
Add ribbons, stickers, printed names, or handwritten messages to create a unique presentation.
Pros and Cons of Making a Paper Gift Card Holder with Cricut
Pros
- Beginner-friendly and easy to learn
- Produces clean, precise cuts
- Suitable for seasonal and personalised designs
- Affordable material costs
Cons
- Requires a Cricut machine and compatible software
- Paper can bend, tear, or wear over time
- Limited durability compared with wood or acrylic holders
- Less suitable for premium gifts or long-term keepsakes
Method 2: Make a Felt Gift Card Holder with a Sewing Machine
A felt gift card holder is a popular choice for handmade gifts because it offers a soft texture and a charming, handcrafted appearance. Using a sewing machine helps create neater stitching, improves durability, and significantly speeds up the assembly process compared with hand sewing.
Felt holders are especially popular for Christmas gifts, birthdays, weddings, baby showers, and festive gift packaging. With a wide range of colours, patterns, and decorative accessories available, they can be easily personalised to suit different occasions.
Materials and Tools Needed
- Felt fabric
- Sewing machine
- Fabric scissors
- Needle and thread
- Buttons, ribbons, or decorative embellishments (optional)
- Fabric glue (optional)
Steps to Make a Felt Gift Card Holder with a Sewing Machine
1. Cut the Felt Pieces
Measure and cut the felt fabric into your preferred gift card holder shape and size.
2. Create the Pocket Structure
Fold or layer the felt pieces to form a pocket that securely holds the gift card.
3. Sew the Edges
Use a sewing machine to stitch around the edges, leaving an opening for the card.
4. Add Decorative Details
Personalise the holder with embroidery, buttons, ribbons, appliqués, or themed felt decorations.
5. Insert the Gift Card
Once the stitching is complete, place the gift card inside the finished holder.
Pros and Cons of Making a Felt Gift Card Holder with a Sewing Machine
Pros
- Soft and attractive handmade appearance
- Reusable and more durable than paper holders
- Easy to personalise with decorations and embroidery
- Suitable for seasonal and festive gift packaging
Cons
- Requires sewing equipment and basic sewing skills
- More time-consuming than paper-based methods
- Difficult to achieve highly precise shapes and intricate designs
- Less suitable for batch production or commercial gifting projects
Method 3: Make a Wooden Gift Card Holder with a Saw
Wooden gift card holders offer a more premium appearance and greater durability than paper or felt alternatives. They are commonly used for Christmas gifts, weddings, anniversaries, corporate gifting, and personalised keepsakes that recipients can retain long after the gift card has been used.
Using a saw allows you to create simple wooden gift card holders from plywood or thin timber sheets. The finished holder can be painted, stained, or customised with names, messages, and decorative elements to create a more meaningful presentation.
Materials and Tools Needed
- Thin wood board or plywood
- Saw
- Sandpaper
- Wood glue
- Pencil and ruler
- Paint, wood stain, or decorative materials
Steps to Make a Wooden Gift Card Holder with a Saw
1. Design the Holder
Sketch the dimensions and layout of the gift card holder, including the slot that will hold the card securely.
2. Cut the Wooden Pieces
Use a saw to cut the main body and any additional pieces required for the holder.
3. Sand the Surfaces
Smooth all edges and surfaces using sandpaper to improve safety and create a cleaner finish.
4. Assemble the Structure
Apply wood glue and carefully join the pieces together. Allow sufficient drying time before handling.
5. Personalise the Design
Add paint, wood stain, names, messages, or decorative details to enhance the finished appearance.
Pros and Cons of Making a Wooden Gift Card Holder with a Saw
Pros
- Premium and professional appearance
- Durable and reusable
- Suitable for personalised gifts and keepsakes
- More substantial feel than paper or felt holders
Cons
- Requires woodworking tools and workspace
- More labour-intensive than paper or fabric projects
- Achieving precise cuts can be challenging for beginners
- Difficult to produce multiple identical holders consistently
- Limited engraving and decorative options without additional equipment
Method 4: Make a Gift Card Holder with a Laser Cutter
For users who want professional-looking results, a laser cutter is one of the most efficient ways to make custom gift card holders. Unlike manual cutting methods, laser cutters follow a digital design file to produce precise cuts, clean edges, and detailed engravings with minimal effort.
Laser cutting is particularly suitable for creating personalised gift card holders from wood, acrylic, leather, cardboard, and felt. Whether you're making a one-off gift for a family member or producing multiple holders for a small business, laser cutting offers greater accuracy, consistency, and creative freedom than traditional DIY methods.
Materials and Tools Needed
- Laser cutter
- Wood, acrylic, leather, cardstock, or felt
- Design software
- Wood glue or adhesive
- Sandpaper (optional)
- Paint, stain, ribbons, or decorative materials (optional)
Steps to Make a Gift Card Holder with a Laser Cutter
1. Create the Design File
Design the gift card holder template using vector-based design software.
2. Prepare the Material
Place the material inside the laser cutter and select the appropriate cutting and engraving settings.
3. Cut and Engrave the Design
Allow the laser cutter to create the holder shape, card slot, and any decorative engravings in a single workflow.
4. Assemble the Holder
Connect or glue the pieces together if the design includes multiple layers.
5. Finish the Project
Apply paint, stain, ribbons, or personalised finishing touches as desired.
Pros and Cons of Making a Gift Card Holder with a Laser Cutter
Pros
- Exceptional cutting precision
- Easy personalisation with engraved names, logos, and artwork
- Suitable for wood, acrylic, leather, paper, and more
- Consistent results for single or batch production
- Professional-looking finished products
Cons
- Requires a laser cutter and design software
- Higher initial investment than manual crafting methods
- Learning basic design software may be necessary
Recommended Portable Laser Cutter for Gift Card Holders: LaserPecker LP2 Plus
For UK hobbyists, crafters, and small business owners who want to create personalised gift card holders without dedicating an entire workshop to laser equipment, the LaserPecker LP2 Plus offers an excellent balance of portability, precision, and ease of use.
The compact design makes it ideal for producing custom gift card holders, gift tags, ornaments, and personalised accessories from a wide range of materials.
Key Features of the LaserPecker LP2 Plus for Making Gift Card Holders
Ultra-Fast Engraving Speed
With engraving speeds of up to 4,000 mm/s, the LP2 Plus helps users complete customised projects quickly and efficiently.
10W Diode Laser
The powerful 10W diode laser delivers cleaner cutting and deeper engraving on wood, leather, cardboard, and selected acrylic materials.
Wide Material Compatibility
Supports a variety of popular craft materials, allowing makers to experiment with different gift card holder styles and finishes.
Dual Red-Dot Focus System
The dual red-dot positioning system improves alignment accuracy when engraving names, patterns, and detailed artwork.
Portable Desktop Design
Its compact footprint makes it suitable for home studios, craft fairs, and limited workspace environments.
Enhanced Safety for Indoor Use
When paired with the LaserPecker Standard Enclosure, the LP2 Plus can achieve Class 1 Laser Safety, making it a more suitable option for home users who prioritise safety.
For indoor crafting environments, the LP2 Plus can also be used alongside the LaserPecker Desktop Smoke Purifier, which helps filter smoke, odours, and airborne particles generated during engraving and cutting projects.
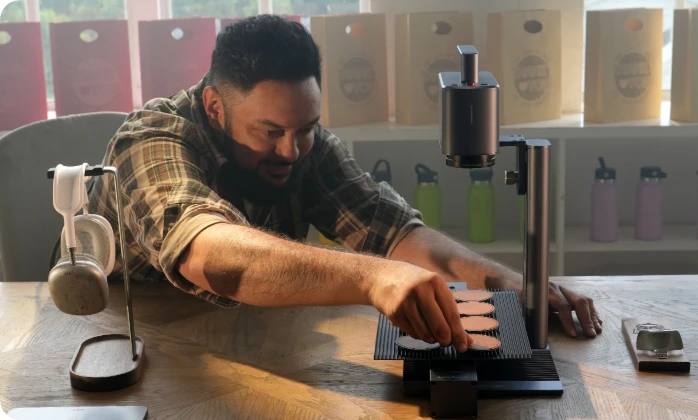
Recommended Desktop Laser Cutting Machine for Making Gift Card Holders: LaserPecker LX2
If your focus is on cutting wooden gift card holders, producing intricate designs, or creating multiple holders efficiently, the LaserPecker LX2 provides more advanced cutting capabilities.
Its larger workspace and enhanced cutting performance make it particularly suitable for UK makers, NOTHS sellers, and small businesses producing premium gift packaging products.
Key Features of the LaserPecker LX2 for Making Wooden Gift Card Holders
Precise Laser Cutting and Engraving
Create clean cuts, detailed engravings, layered structures, and decorative patterns with professional consistency.
Large Working Area
Process multiple gift card holder components in a single operation to improve productivity.
Multiple Laser Module Options
Different laser modules support various materials and project requirements.
Wide Material Compatibility
Suitable for wood, acrylic, leather, cardboard, coated metals, and many other crafting materials.
Software-Controlled Precision
Digital workflow control improves repeatability when producing multiple holders with identical designs.
Class 1 Laser Safety
The LX2 is designed with Class 1 Laser Safety, making it suitable for creators who prioritise safe operation in workshops and indoor environments.
Cleaner Indoor Working Environment
The LX2 can be paired with the LaserPecker Desktop Smoke Purifier to reduce smoke, fumes, and unwanted odours generated during cutting and engraving, helping maintain a cleaner indoor workspace.
Compact Desktop Design
Despite its larger working area, the LX2 remains suitable for home workshops, creative studios, and small business environments.

FAQs Hot Questions about Making a Gift Card Holder
Q1: What Size Should a Gift Card Holder Be?
Most gift cards measure approximately 85.6 × 54 mm. A gift card holder should be slightly larger than the card itself to allow smooth insertion and removal. When designing your own holder, it's best to leave a few millimetres of extra clearance around the card slot.
Q2: What Is the Best Material for a Wooden Gift Card Holder?
Birch plywood, basswood, and MDF are among the most popular materials for wooden gift card holders. Birch plywood is especially favoured because it offers a smooth surface, attractive layered edges, and excellent engraving results.
Q3: Can I Make a Gift Card Holder Without Special Tools?
Yes. Paper gift card holders can be created using scissors, glue, and basic craft supplies. Felt holders can also be made with simple sewing tools or fabric glue, making them ideal for beginner DIY projects.
Q4: Is a Laser Cutter Better Than a Cricut for Making Gift Card Holders?
Both tools can produce attractive gift card holders, but they serve different purposes. A Cricut is well suited to paper-based projects, while a laser cutter can cut and engrave materials such as wood, acrylic, leather, cardboard, and felt. For users looking for premium, personalised, and long-lasting gift card holders, laser cutting typically offers greater versatility.
Q5: Can I Personalise a Gift Card Holder with Names or Messages?
Absolutely. Personalisation is one of the main advantages of making your own gift card holder. Depending on the method you choose, you can add printed text, handwritten notes, decorative artwork, or laser-engraved names and messages to create a unique gift.
Q6: What Is the Best Way to Make Multiple Gift Card Holders Quickly?
If you need to produce several identical gift card holders for weddings, corporate gifting, school events, or small business orders, a laser cutter is usually the most efficient option. Digital templates can be reused repeatedly, ensuring consistent quality and faster production.
Conclusion
Making your own gift card holder is an excellent way to add a personal touch to birthdays, Christmas gifts, weddings, and other special occasions. The best method depends on your budget, available tools, and the type of finished product you want to create.
Paper gift card holders are affordable and beginner-friendly, while felt holders offer a softer handmade appearance. Wooden gift card holders provide a more premium and durable option, although they typically require additional tools and manual effort.
For UK makers looking for the highest level of precision, customisation, and efficiency, laser cutting stands out as the most versatile solution. It allows you to create clean cuts, detailed engravings, and professional-looking gift card holders from materials such as wood, acrylic, leather, and cardstock.
Whether you're creating a one-off personalised gift or producing multiple holders for a small business, machines such as the LaserPecker LP2 Plus and LaserPecker LX2 make it easier to turn creative ideas into high-quality finished products.





