Acrylic keychains are a fun and creative way to express your personality or make a thoughtful handmade gift. Whether you're a DIY enthusiast, a small business owner, or just looking to try something new, making custom acrylic keychains is surprisingly easy!
In this article, we'll walk you through three different methods to make your own acrylic keychains: using a laser machine, a vinyl cutter, and a combination of laser cutting and UV printing. Each method offers a unique finish and suits different levels of experience, tools, and creative goals. Let's dive in and find the method that's right for you!
In this article:

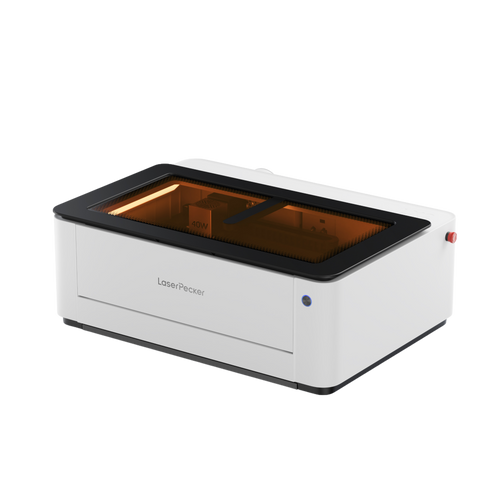
Method 1: Craft Custom Acrylic Keychains With Laser Machine
Making a personalized acrylic keychain is surprisingly easy—especially with the help of a powerful tool like a laser machine, which can streamline the entire process.
What's more, using a laser machine allows for more creative and unique designs. In fact, there are actually three different choices to make acrylic keychains with a laser machine. Depending on the look you're going for, you can choose the method that suits your style best.

Choice 1: Engraving Directly on the Acrylic Keychain
In this case, you use a laser machine to engrave a name, pattern, logo, or custom text directly onto an acrylic keychain at home. This method works great on engraving both transparent acrylic and opaque acrylic.

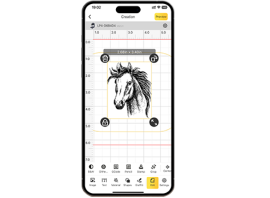
To do that, simply design your artwork in software like Illustrator, LightBurn, or LDS, place the acrylic on the laser bed, and adjust the engraving settings to suit the material. The result is a sleek, professional-looking keychain with a permanently etched design.
Choice 2: Engraving on the Acrylic Keychain with Marking Paper
This method involves placing a piece of marking paper over the acrylic surface before engraving. The laser burns through the marking layer, transferring the design onto the acrylic underneath.

The biggest advantage of this method is that the engraved pattern can be colored—a great option if you want to add a personal touch or make the design pop with vibrant paints or special fills. It works especially well on transparent or lightly tinted acrylic, giving you more creative flexibility.
Choice 3: Cutting Vinyl and Transferring It to the Acrylic Keychain
Here, the laser machine is used to cut adhesive vinyl rather than engraving the acrylic itself. Once the vinyl design is cut out, you remove the excess (a process called weeding), apply transfer tape, and stick it onto the surface of the acrylic blank.
This is a great option if you want to incorporate colors or layered effects. You can also use the laser machine to cut the acrylic into custom shapes, combining precision cutting with colorful vinyl decoration for a personalized look.
Method 2: Make Custom Acrylic Keychains With a Vinyl Cutter Machine
This method is perfect if you want to add vibrant, colorful designs to your acrylic keychains using adhesive vinyl. It's simple, beginner-friendly, and doesn't require engraving—just precision cutting and a bit of creativity.
Step 1: Design Your Artwork
Start by creating or importing your design using software like Cricut Design Space, Silhouette Studio, or Adobe Illustrator. Whether you're designing names, icons, or fun graphics, be sure to size your artwork to fit the acrylic blank you'll be using.
Step 2: Cut the Vinyl
Load a sheet of permanent adhesive vinyl into your vinyl cutter. After adjusting your machine's material settings and blade depth, send the design to cut. Let the machine work its magic and produce a clean, precise cut.
Step 3: Weed the Excess Vinyl
Once the vinyl is cut, carefully peel away the parts you don't need using a weeding tool. This step reveals the final shape of your design, leaving only the vinyl you plan to apply to the acrylic.
Step 4: Transfer the Vinyl Design
Place a piece of transfer tape over your weeded design and press it firmly to ensure it sticks. Then, slowly peel the tape away from the vinyl backing, making sure the entire design stays attached to the transfer tape.
Step 5: Apply to the Acrylic Blank
Before applying the vinyl, clean the surface of your acrylic blank with rubbing alcohol to remove any dust or oils. Align the vinyl design on the acrylic, press it down smoothly, and gently remove the transfer tape to reveal the finished look.
Step 6: Seal the Design (Optional)
To protect the vinyl from wear and tear, you can seal the surface with a layer of UV resin or a clear craft sealant like Mod Podge. While optional, this extra step can help your keychain last longer, especially if it's used daily.
Step 7: Add Keychain Accessories
The final touch is adding your keyring or charm. Use the pre-drilled hole in the acrylic blank to attach your accessories, and your personalized keychain is complete—ready to keep or give as a thoughtful gift.
Method 3: Make Personalized Acrylic Keychains With a Laser Cutter and UV Printer
Combining a laser cutter with a UV printer lets you take acrylic keychains to a whole new level. This method is perfect for full-color, high-resolution designs—ideal for logos, illustrations, or photo-based artwork. The laser handles the shape, and the UV printer brings your design to life with stunning color and detail.
Step 1: Prepare Your Design
Begin by creating your artwork in a design program such as Adobe Illustrator or CorelDRAW. Since you'll be printing in full color, make sure your design is high-resolution and formatted to match the size and shape of your acrylic keychain. You may also want to include a cutline layer for laser cutting.
Step 2: Print the Design With a UV Printer
Place a blank acrylic sheet into your UV printer and align it properly. Once everything is set, print your design directly onto the acrylic surface. UV printers cure the ink instantly, giving you vibrant, durable prints that won't smudge or fade. You can also print a layer of white ink underneath for better color contrast on transparent acrylic.
Step 3: Cut the Acrylic Keychain Shape With a Laser Cutter
After the design is printed and fully cured, move the printed acrylic sheet to your laser cutter. Use the cutline you prepared earlier to accurately cut out the shape of the keychain. Make sure your laser settings are adjusted for clean cuts based on the acrylic's thickness.
Step 4: Add a Protective Coating (Optional)
To enhance durability—especially for keychains that might get tossed into bags or pockets—you can apply a thin layer of clear resin or a protective laminate over the printed surface. This step helps prevent scratching or fading over time.
Step 5: Attach Keychain Accessories
With your custom acrylic piece cut and printed, finish it off by attaching keychain hardware through the pre-cut hole. Add charms or tassels if you'd like, and your full-color, professional-grade acrylic keychain is ready to show off or sell.
Conclusion:
No matter which method you choose, crafting your own acrylic keychains is a rewarding and customizable project. From the sleek precision of laser engraving to the colorful flair of vinyl and the professional finish of UV printing, there's a technique for every style and skill level.
So grab your materials, fire up your tools, and start creating something uniquely yours. Whether it's for personal use, gifts, or even a small business idea, custom acrylic keychains are a fun and stylish way to turn your creativity into something you can hold in your hand.


