















































Personalised stockings are a timeless way to make Christmas decorations feel more festive and meaningful. Whether you're preparing stockings for family members, pets, guests, or thoughtful holiday gifts, adding a name gives each one a special touch and makes it instantly recognisable.
There are several ways to personalise a stocking, from traditional stitching to modern crafting techniques. In this guide, we'll compare three popular methods, explore their advantages and limitations, and help you decide which option best suits your budget, skills, and desired finish. If you're looking for precision, durability, and a premium result, laser engraving may offer the most versatile solution.

In this article:
Method 1: Put a Name on Stockings via Stitching
Stitching is one of the most traditional ways to personalise Christmas stockings and remains a favourite for those who enjoy handmade festive crafts. By sewing a name directly onto the fabric, you can create a soft, textured finish that adds warmth and character to each stocking.
This method works particularly well with materials such as felt, fleece, velvet, cotton, and knitted fabrics. While it requires more time and basic sewing skills, stitched names offer a classic appearance and excellent durability. With proper care, they can withstand years of Christmas celebrations, making them ideal for family stockings and keepsake holiday gifts.
Method 2: Put a Name on Stockings via Heat Transfer Vinyl
Heat transfer vinyl (HTV) is a popular choice for those looking for a quick and beginner-friendly way to personalise Christmas stockings. By using heat and pressure, a pre-cut vinyl name is bonded to the surface of the stocking, creating a neat, colourful design with minimal sewing or crafting experience required.
HTV works particularly well for Christmas stockings, family stockings, holiday gifts, and festive DIY projects. Compared with stitching, it is faster to apply, easier to replicate across multiple stockings, and ideal for bold lettering, simple fonts, and decorative designs. However, repeated washing and frequent use may gradually affect its long-term durability.
Method 3: Put a Name on Leather Patch of Stockings via Laser Engraving
Laser engraving a leather patch is one of the most stylish and professional ways to personalise Christmas stockings. Rather than engraving directly onto the fabric, the name is engraved onto a leather or faux leather patch, which is then attached to the stocking. This approach delivers a premium finish while preserving the texture and appearance of the stocking itself.
It is particularly suitable for Christmas stockings, family stockings, pet stockings, and personalised holiday gifts. Compared with stitching and heat transfer vinyl, engraved leather patches offer a more refined look, excellent durability, and greater design flexibility. They work beautifully for names, initials, dates, festive motifs, and simple decorative icons.
Materials and Tools Needed
- Stocking
- Leather or faux leather patch
- Laser engraver
- Design software
- Fabric glue, sewing needle, or rivets
- Masking tape or positioning tools
- Soft cloth
- Ventilation or smoke extraction system
Steps to Put a Name on Leather Patch of Stockings via Laser Engraving
1. Choose the Patch Material
Select a leather or faux leather patch that complements the colour and style of the stocking.
2. Create the Name Design
Type the name in your design software, choose a clear and readable font, and add small festive details if desired.
3. Prepare the Leather Patch
Wipe the surface with a soft cloth to remove dust, oils, and loose fibres before engraving.
4. Set Up the Laser Engraver
Place the patch flat within the engraving area and secure it to prevent shifting during operation.
5. Test the Laser Settings
Use a spare piece of material to identify the ideal power, speed, and engraving depth before engraving the final patch.
6. Engrave the Name
Begin the engraving process and allow the machine to produce a crisp, detailed design.
7. Clean the Patch
Once cooled, gently remove any engraving residue from the patch surface.
8. Attach the Patch to the Stocking
Secure the finished patch to the stocking cuff or front panel using glue, stitching, or rivets.
9. Check the Final Finish
Ensure the patch is firmly attached, the name is easy to read, and the overall design looks balanced and polished.
Recommended Laser Engraver for Putting a Name on a Stocking: LaserPecker LP2 Plus
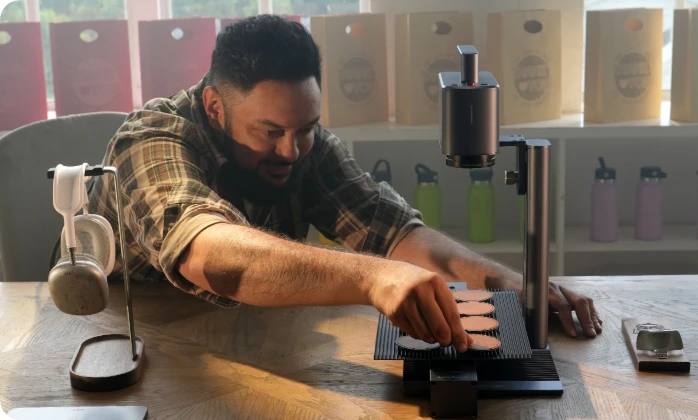
For UK makers looking to create personalised stockings at home, the LaserPecker LP2 Plus is a compact and beginner-friendly option worth considering. It is ideal for engraving names, initials, dates, and festive patterns onto leather or faux leather patches before attaching them to stockings.
When paired with the LaserPecker Standard Enclosure, the LP2 Plus achieves Class 1 Laser Safety, offering added peace of mind for home workshops and indoor crafting environments. Users can also pair it with the LaserPecker Desktop Smoke Purifier, which helps filter fumes and odours generated during engraving, making indoor use cleaner and more comfortable.
Key Features of the LaserPecker LP2 Plus for Stocking Name Patches
10W Diode Laser for Leather Patch Engraving
The 10W diode laser produces clear and detailed engravings on leather and faux leather, making it ideal for names, initials, festive patterns, and decorative accents.
Compact and Easy to Use
Its space-saving desktop design makes it well suited to home craft rooms, spare rooms, and small creative studios.
Fast Engraving Performance
With engraving speeds of up to 4,000 mm/s, the LP2 Plus allows users to complete personalised stocking projects efficiently, whether creating a matching family set or preparing small batches of gifts.
FAQs: Hot Questions about Putting a Name on Stockings
Q1. Where should a name be placed on a stocking?
The stocking cuff is the most popular location because it is easy to see when the stocking is hanging. Names can also be added to the front panel or engraved onto a decorative leather patch attached to the stocking.
Q2. Can you use heat transfer vinyl on stockings?
Yes. HTV works well on many fabric stockings, including felt, fleece, cotton, and polyester blends. Always check the fabric type and follow the recommended heat settings for the vinyl.
Q3. Can you laser engrave a name on a stocking?
Yes. One of the most practical approaches is to engrave a leather or faux leather patch and then attach it to the stocking. This creates a durable and professional-looking personalised finish.
Q4. What is the most durable way to put a name on a Christmas stocking?
Stitched names and laser-engraved leather patches tend to last the longest. While HTV offers a quick solution, stitching and laser engraving generally withstand years of festive use with proper care.
Q5. Should you use first names or titles like Mum and Dad on stockings?
Many UK families prefer using first names, especially if the stockings are intended to become keepsakes that can be reused year after year. Others choose "Mum" and "Dad" to reflect family traditions. Ultimately, it comes down to personal preference.
Q6. What font works best for stocking names?
Simple and easy-to-read fonts usually provide the best results. Script fonts can look elegant, but bold serif or sans-serif styles tend to be more legible, particularly for laser engraving and HTV projects.
Conclusion
Adding a name to a Christmas stocking is a simple way to make festive décor feel more personal and memorable. Stitching offers a traditional handmade touch, while heat transfer vinyl provides a quick and beginner-friendly solution.
For those seeking a more refined finish, laser-engraved leather patches combine durability, precision, and a premium look. Whichever method you choose, use a clear font, test your materials beforehand, and keep the placement consistent. With the right approach, personalised stockings can become cherished Christmas keepsakes for years to come.





