















































Picture frames not only protect your photos but also bring your memories to life while adding character to your home décor. Making your own picture frame allows you to choose the design, materials, and finishing touches to suit your personal style.
Whether you enjoy traditional woodworking or want to explore modern laser cutting, this guide will walk you through two effective ways to create a picture frame that truly stands out.

In this article:
- Part 1: Why Making Your Own Picture Frame Is So Popular
- Part 2: 2 Best Methods to Make a Custom Picture Frame
- Method 1: Make a Picture Frame Using Woodworking Tools
- Method 2: Make a Picture Frame Using a Laser Cutter
- Part 3: Creative Ideas for Custom Picture Frames
- Part 4: Tips for Making the Perfect Picture Frame
- FAQs: Common Questions About Making Your Own Picture Frame
Part 1: Why Making Your Own Picture Frame Is So Popular
Custom picture frames are popular because they combine creativity, practicality, and personal meaning. By making your own frame, you can achieve a perfect match for your home décor, choose high-quality materials, and add unique details that standard, shop-bought frames simply cannot offer.
In addition, DIY picture framing can be a cost-effective option compared to buying bespoke frames. It is also an enjoyable and rewarding project, especially for those who appreciate creating functional pieces of art for their home.
Part 2: 2 Best Methods to Make a Custom Picture Frame
When it comes to making a custom picture frame, there are two main approaches: traditional woodworking and modern laser cutting. Woodworking offers a handcrafted, timeless look, while laser cutting focuses on precision, efficiency, and creative flexibility.
Method 1: Make a Picture Frame Using Woodworking Tools
Woodworking is a time-honoured method for crafting picture frames. It allows you to shape, assemble, and finish wood by hand, resulting in a truly bespoke and personal piece.
Pros and Cons
Pros:
- Creates a classic, handcrafted aesthetic
- Full control over size, colour, and finish
- Ideal for DIY enthusiasts who enjoy working with natural materials
Cons:
- Requires tools, time, and basic woodworking skills
- More time-consuming than ready-made options
- Final quality depends on craftsmanship
Tools and Materials
- Wooden boards (e.g. oak, pine, or reclaimed wood)
- Saw (a mitre saw is recommended)
- Sandpaper
- Wood glue and clamps
- Nails or screws
- Wood stain or paint (optional)
- Measuring tape and pencil
- Glass or acrylic sheet (front cover)
Step-by-Step Guide
Step 1: Measure your photo. Allow around 1–1.5 cm overlap on each side so the picture fits securely.
Step 2: Cut the wood at 45-degree angles using a mitre saw for clean corners.
Step 3: Sand all edges until smooth.
Step 4: Assemble the frame using wood glue and clamps. Reinforce with nails or screws if needed.
Step 5: Apply stain, paint, or sealant based on your preferred finish.
Step 6: Insert the glass or acrylic panel, followed by the photo and backing board.
Step 7: Attach hanging hardware such as brackets or wire.
Method 2: Make a Picture Frame with a Laser Cutter (Recommended: LP5)
Laser cutting is a modern and efficient way to create custom picture frames with clean edges and detailed engravings. Unlike traditional woodworking, it allows you to design intricate patterns, shapes, and text with high precision.

Pros and Cons
Pros:
- High precision and professional finish
- Ability to engrave names, dates, and decorative patterns
- Fast production, ideal for gifts or small batches
Cons:
- Requires access to a laser cutter
- Learning curve for design software
- Higher upfront cost compared to basic tools
Tools and Materials
- Laser cutter (LP5 recommended)
- Wood sheets (e.g. basswood)
- Design software (LightBurn or LaserPecker Design Space)
- Photo and backing board
Step-by-Step Guide
Step 1: Create your frame design using vector software, including borders, patterns, or text.
Step 2: Choose flat, thin wood sheets such as basswood for clean cutting results.
Step 3: Adjust laser power and speed according to material thickness.
Step 4: Use the LP5 to cut the frame components precisely. You can experiment with layered designs or decorative cut-outs.
Step 5: Engrave personalised details such as names, dates, or messages.
Step 6: Assemble the frame, insert the front panel and photo, and secure the backing.
Why the LP5 Stands Out
The LaserPecker LP5 is designed for both precision cutting and detailed engraving. It features a dual-laser system, combining a 20W diode laser for cutting and a 20W fibre laser for fine engraving.
With speeds up to 10,000 mm/s, it is suitable for both hobbyists and small businesses across the UK.
Additional benefits include:
- Support for deep engraving and textured designs
- Expansion options for larger or curved projects
- Compatibility with popular design software
- Class 1 laser safety enclosure for indoor use
This makes it a reliable solution for creating personalised picture frames for home décor, gifts, or commercial use.
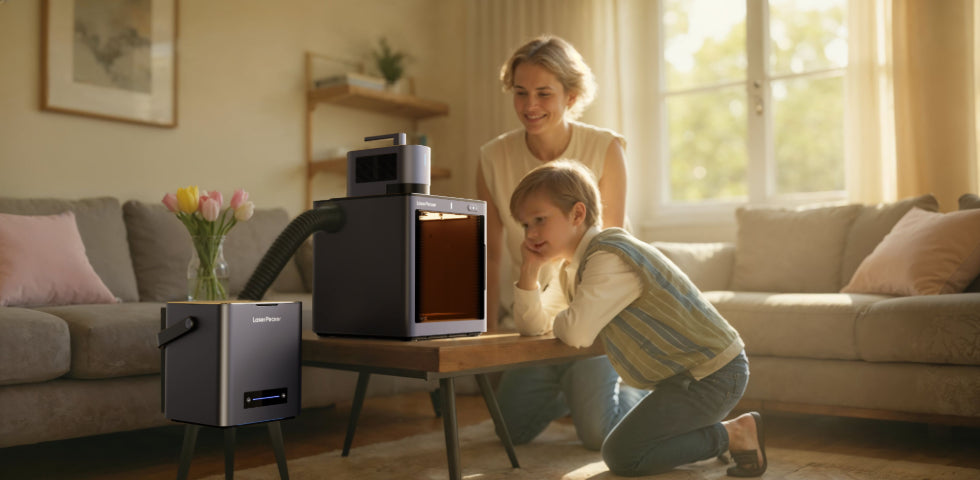
Also Recommended: LX2 for Larger Wooden Picture Frames
For users who want to cut larger and thicker wooden picture frames, the LaserPecker LX2 is a strong alternative. It is particularly suitable when working with oversized frame panels or thicker hardwood materials.
Key advantages for picture frame making:
- ⚡ Blazing HyperSpeed: Up to 1000mm/s engraving speed improves batch production of frame components
- 🔧 Tool-Free Quick Swap: Easily switch between 20W/40W/60W diode modules to match different wood thicknesses
- 🎯 Dual Precision Alignment: Point-to-shape positioning with 12MP/6K camera ensures accurate frame border engraving
- 📦 Large-Format Capacity: Ideal for cutting oversized frame backs, mounts, and decorative panels
- 🔄 3D Rotary Ready: Engrave curved or cylindrical decorative frame elements
- 🛡️ Class-1 Safety Certified: Suitable for indoor workshops and home studios

Part 3: Creative Ideas for Custom Picture Frames
Custom picture frames do not have to be ordinary. By experimenting with different materials and design styles, you can create truly unique pieces that reflect your personality and home décor.
Type 1: Glass Photo Frame
Glass picture frames offer a clean and modern aesthetic — but laser engraving can take them to the next level. By engraving directly onto the glass surface, you can create a frosted, monochrome effect that resembles an elegant etched photograph.
The result is a striking image that appears to glow within the glass while remaining permanently preserved.
This style works particularly well for:
- Portrait photography
- Landscape images
- Meaningful personal memories
For best results:
- Use high-contrast images
- Convert photos to greyscale
- Choose darker backgrounds to enhance detail visibility
This technique transforms a simple glass panel into a refined and personalised piece of art.
Type 2: Wood & Acrylic Music Frame
This design combines the natural warmth of wood with the sleek, modern look of acrylic — creating a balanced and contemporary style.
A popular idea is to engrave a QR code or music waveform onto the acrylic layer. When scanned, the code links to a meaningful song, allowing you to both see and hear a memory.
These frames are ideal for:
- Anniversary gifts
- Wedding keepsakes
- Personalised home décor
Type 3: Driftwood or Rustic Frame
Driftwood and rustic-style frames bring a natural, weathered charm that suits coastal, countryside, or farmhouse interiors.
Because each piece of wood has its own grain, texture, and imperfections, every frame becomes completely unique. These natural details add character and authenticity that cannot be replicated.
Type 4: Recycled Material or Vinyl Record Frame
Using recycled materials is an eco-friendly and creative way to design custom picture frames. Materials such as vinyl records, cardboard, or repurposed plastic can be transformed into distinctive decorative pieces.
For example, cutting and shaping an old vinyl record into a frame not only displays a photo but also celebrates music and nostalgia.
These frames are perfect for:
- Sustainable home décor
- Creative DIY projects
- Unique and thoughtful gifts
Part 4: Tips for Making the Perfect Picture Frame
Creating a high-quality picture frame requires attention to detail. Follow these practical tips to achieve the best results:
Measure accurately
Always measure your photo twice before cutting. This ensures a precise fit and prevents gaps or cropped edges.
Choose suitable materials
Select frame materials that complement both your interior décor and the style of the photo:
- Wood: warm and traditional
- Acrylic: clean and modern
- Metal: industrial and contemporary
Prepare wood surfaces properly
If you are working with wood, sand all edges thoroughly. A smooth finish significantly improves the overall appearance.
Test laser settings in advance
When using a laser cutter, always test your settings on spare material first. Adjust power and speed based on thickness to avoid damaging your final piece.
Keep the design balanced
Avoid over-decorating the frame. Subtle details often create a more refined and visually appealing result.
Apply protective finishes
Use varnish for wooden frames or protective film for acrylic. This helps prevent scratches, moisture damage, and long-term wear.
FAQs: Common Questions About Making Your Own Picture Frame
1. What materials are best for DIY picture frames?
Wood remains a popular choice due to its timeless appearance and versatility. It can be stained or painted to match different interior styles.
For a more modern look, acrylic offers a sleek finish and allows for layered or engraved designs. Metal options such as aluminium or brass provide durability with an industrial aesthetic.
If sustainability is a priority, recycled materials like cardboard or vinyl records can also be used creatively. With a laser cutter, all of these materials can be processed with precision.
2. Do I need advanced skills to make a picture frame?
No advanced skills are required to get started. Basic woodworking involves simple techniques such as measuring, cutting, sanding, and assembling. Beginners are advised to start with simple square or rectangular frames.
Using a laser cutter can simplify the process significantly. You can design your frame digitally, and the machine handles both cutting and engraving. Many beginner-friendly design tools are available, making it accessible for users of all skill levels.
3. Can I sell DIY picture frames?
Yes, handmade picture frames are in demand across craft markets, online platforms such as Etsy, and local retail shops.
Personalised frames featuring names, dates, or custom designs are particularly popular for occasions like weddings, birthdays, and home decoration.
This can be a great opportunity to start a small creative business in the UK.
4. What size picture frames can I make?
The size of your frame depends on your tools and materials. Traditional woodworking allows for larger frame sizes, depending on your workspace.
With a laser cutter, the maximum size is typically limited by the machine’s working area. However, some machines offer extension options, and larger frames can be created by assembling multiple sections.
5. What is the best wood for making picture frames in the UK?
Common choices in the UK include oak, pine, and MDF.
- Oak: strong and premium finish
- Pine: affordable and easy to work with
- MDF: smooth surface, ideal for painting
The best option depends on your budget and desired finish.
6. Is a laser cutter worth it for DIY picture frames?
A laser cutter is worth considering if you plan to create multiple frames or require precise and detailed designs.
It allows for:
- Accurate cutting
- Intricate engraving
- Faster production
For hobbyists and small businesses, it can significantly improve efficiency and design possibilities.
Conclusion
Making your own picture frame is a rewarding and creative project. You can choose traditional woodworking to achieve a handcrafted, timeless look, or opt for a laser cutter such as the LP5 for precise cuts and personalised designs.
Whether you prefer natural wooden frames, modern acrylic styles, or fully customised creations, DIY picture framing allows you to transform everyday materials into meaningful pieces that showcase your favourite photos.
For users in the UK, combining creativity with modern tools like laser cutters can significantly expand your design possibilities while maintaining efficiency and consistency.





