















































Clothing has always been a powerful way to express individuality and personal style. While traditional methods like embroidery and printing remain popular, laser engraving is becoming a preferred alternative across the UK thanks to its precision and versatility.
From independent fashion brands to DIY enthusiasts customising denim, jackets, and leather goods, this technique offers clean detail and consistent results.
In this guide, we'll cover what clothing laser engraving is, how it works on different fabrics, the best machines to use, and key safety considerations for home or workshop setups.

In this article:
- Part 1: Overview of Clothing Laser Engraving
- 1.1 What is Clothing Laser Engraving
- 1.2 How Does Laser Engraving Work on Clothing
- 1.3 Which Laser Engraving Machine is Best for Clothing
- 1.4 Safety Precautions Before Engraving Clothing
- Part 2: Why Use Laser Engraving for Clothing
- Case Study: How to Laser Engrave Clothing in 5 Steps 💡
- FAQs: Hot Questions about Clothing Laser Engraving
Part 1: Overview of Clothing Laser Engraving
What is Clothing Laser Engraving?
Clothing laser engraving is an advanced technique that uses a highly focused laser beam to etch or mark designs directly onto fabric surfaces. Unlike traditional methods such as printing or embroidery, this process requires no inks, threads, or physical contact.
Instead, the laser precisely removes or modifies the top layer of the material to create permanent patterns, logos, or textured effects. In the UK, it is widely used across fashion, sportswear, denim, and leather goods, particularly by independent brands and small businesses looking to create distinctive, personalised designs.

1.2 How Does Laser Engraving Work on Clothing?
Laser engraving works by directing a concentrated beam onto the fabric surface. Depending on the material, the laser can:
- Alter the colour of the fibres
- Remove a thin surface layer
- Create a textured or engraved effect
For example, when applied to denim, the laser can lighten specific areas to replicate a "washed" or vintage look. On leather, it produces clean, sharp engravings with strong contrast.
By adjusting key settings such as power, speed, and focus, designers can achieve a wide range of results—from subtle detailing to bold, high-contrast patterns. This level of control makes clothing laser engraving especially popular for customisation in UK home workshops and small-scale production.

1.3 What Engraving Machine Works Best for Clothing Engraving?
The most commonly used machines for clothing engraving are diode-based laser engraving machines, as they perform especially well on organic materials such as cotton, denim, canvas, and leather.
For home users or small-scale cloth laser engraving projects across the UK, machines such as LP5, LP4, LP2 Plus, and LX2 are popular choices. These cloth laser engraving machines are known for:
- Ease of use, even for beginners
- Compact desktop-friendly size suitable for home workshops
- Cost-effectiveness for hobbyists and small creative businesses
- Reliable performance on natural fabric materials
For users working with larger garment layouts such as tote bags, denim panels, or batch customisation projects, the LX2 offers additional advantages thanks to its 500 × 305 mm working area, which allows more flexible positioning of fabric pieces without frequent repositioning.
Its camera-assisted positioning system also helps improve alignment accuracy when engraving logos or repeated design placements on clothing items, which is especially useful for small-batch production workflows.
In addition, many users in the UK prefer compact laser engraving machines that are compatible with standard household power setups, making them convenient and practical for indoor creative workspaces.

1.4 Safety Precautions Before Engraving Clothing
Safety is essential when working with laser equipment and fabrics. Before starting any project, keep the following precautions in mind:
- Proper Ventilation: Always work in a well-ventilated area, as certain fabrics—especially synthetics—may release fumes during engraving
- Material testing: Test a small fabric sample first, as some materials may burn, melt, or discolour unexpectedly
- Fire safety: Keep a fire extinguisher nearby, since fabrics can ignite if exposed to excessive heat
Part 2: Why Use Laser Engraving for Clothing?
Laser engraving has become a preferred method in the UK fashion and apparel industry, as it combines creative flexibility, production efficiency, and long-lasting results. Compared with traditional garment decoration techniques, it offers several distinct advantages.
① Precision and Detail
Laser engraving enables exceptionally fine detailing that is difficult to achieve with embroidery or printing. Whether it's intricate logos, typography, or delicate patterns, the laser produces sharp lines and consistent textures with high accuracy.
This level of precision is particularly valuable for UK designers and small brands aiming to create premium, personalised clothing.
② Durability
Because the design is engraved directly into the fabric surface, it becomes part of the material rather than sitting on top of it. As a result, it won't peel, crack, or fade over time like screen printing or heat transfer methods.
This makes laser engraving ideal for frequently worn garments such as:
- Sportswear
- Denim clothing
- Work uniforms
For UK consumers, durability is a key factor, especially for everyday wear and work apparel.

③ Versatility Across Materials
Laser engraving works effectively on a wide range of materials, including denim, cotton, polyester, leather, and blended fabrics.
Different materials produce different visual effects, for example:
- Denim → faded or vintage-style textures
- Leather → sharp, high-contrast engravings
- Cotton → subtle tonal markings
This versatility allows designers in the UK to experiment with various styles and finishes using a single process.
④ Speed and Efficiency
Once a design is uploaded to the machine, the engraving process is both fast and highly repeatable. This makes it suitable for:
- One-off personalised pieces
- Small-batch production
- Larger production runs
For UK-based small businesses and creators, this efficiency helps reduce production time while maintaining consistent quality across multiple items.
Case Study: How to Laser Engrave Clothing in 5 Steps💡
Laser engraving clothing may sound complex, but with the right setup, it's a straightforward and rewarding process. Whether you're a hobbyist or running a small UK-based workshop, you can achieve professional-quality results in just a few minutes.
Preparation checklist for laser engraving clothing:
- Engraving Material: Clothing (denim, cotton, leather, etc.)
- Engraving Machine: Diode Laser Engraver
- Engraving Design: Name, Logo, Images, Patterns, and more
Can you engrave clothing? Absolutely. With the right tools and settings, the process is both efficient and beginner-friendly.
Step 1: Prepare Your Design
Start by creating or selecting the artwork, logo, or text you want to engrave. Vector files (such as SVG or AI) are recommended for the cleanest and sharpest results, although most graphic design app/software also supports raster images and text formats.
For best outcomes:
- Use high-contrast designs
- Avoid overly complex fine details on soft fabrics
- Adjust sizing to match your garment
Step 2: Choose the Right Laser Engraving Machine for Clothing Engraving
Selecting the right machine is key to achieving consistent results. For UK users, LaserPecker 4 (LP4) is a highly recommended option.
It features:
- 10W 450nm diode laser
- 2W 1064nm IR laser
- Engraving speeds up to 4,000 mm/s
This dual-laser combination delivers reliable performance across a wide range of clothing materials, including denim, cotton, canvas, and leather, making the LP4 a practical solution for home workshops and small garment customisation setups.
For users working with larger garments or full-panel clothing layouts, the LX2 offers additional flexibility thanks to its 500 × 305 mm working area, which allows engraving across larger fabric surfaces in a single setup without needing multiple repositioning steps. This is especially useful when customising items such as sweatshirts, tote bags, jacket panels, or full-size apparel designs in one pass.
As a result, the LX2 is particularly suitable for UK users who want to improve workflow efficiency when producing repeated clothing designs or handling larger textile engraving projects at home or in small studio environments.
Step 3: Secure the Fabric
Lay the clothing flat on the engraving surface, ensuring there are no wrinkles or folds. Movement during engraving can affect precision and depth.
To keep the fabric stable:
- Use weights, tape, or clamps
- Ensure a smooth and even surface
- Double-check alignment before starting
A properly secured material ensures cleaner and more accurate engraving results.
Step 4: Set up the Clothing Laser Engraving Machine
Use the LaserPecker graphic design app/software or third-party tools (such as Photoshop) to create or import your design. You can also explore LaserPecker CraftZone for ready-made files and creative inspiration.
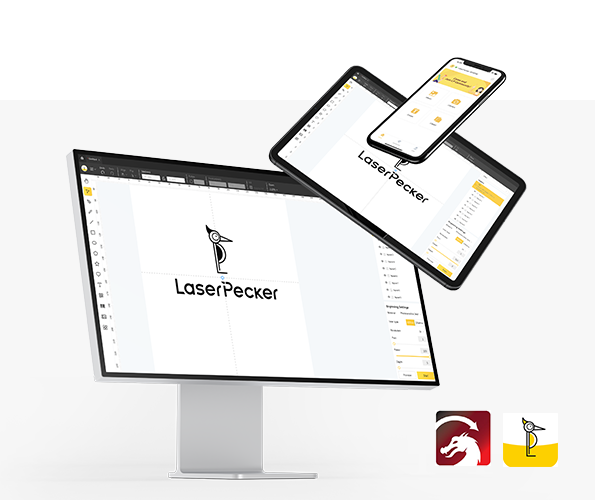
Follow these setup steps:
- Power on your engraver and connect it via WiFi, USB, or Bluetooth
- Open the LaserPecker Design Space and upload your design (JPG, PNG, SVG, G-code, etc.)
- Place your clothing in the working area and enable Preview Mode
- Adjust the position and size to fit the garment precisely

Next, configure your engraving settings:
- Adjust power, speed, and resolution based on the fabric type
- Ensure proper focus before engraving
For optimal results, refer to the recommended laserpecker engraving and cutting parameters. For example, a common setting for clothing engraving includes:
- 10W 450nm Diode Laser
- Resolution: 4K
- Power: 40%
- Depth: 40%
- Pass: 1
⚠️ Safety Tips
When operating a laser engraver, always prioritise safety:
- Wear protective goggles or use a laser safety cover
- Ensure proper ventilation or use a air purifier
- Avoid prolonged exposure to fumes, especially when working with synthetic fabrics
These precautions are particularly important for UK users working in enclosed home environments.
Step 5: Start Engraving Your Clothing With Laser Now
Before starting, double-check all settings and positioning to avoid errors. Once ready, begin the engraving process and monitor it closely.
After engraving:
- Carefully remove the clothing
- Brush off any residue or loose fibres
- Inspect the design for clarity and consistency
For materials like denim or leather, gently wiping the surface with a damp cloth can enhance the final appearance.
FAQs: Hot Questions about Clothing Laser Engraving
Q1. Can you laser engrave clothing at home in the UK?
Yes, clothing laser engraving can be done at home using compact diode laser engravers such as LP4 or LP5. Many UK users set up small home workshops, as these machines are designed to be user-friendly and suitable for indoor use with proper ventilation.
Q2. What fabrics are best for clothing laser engraving?
Natural and semi-natural materials tend to work best, including:
- Denim
- Cotton
- Leather
- Certain polyester blends
These fabrics respond well to laser engraving, producing clear and consistent results.
Q3. Is laser engraving on clothing permanent?
Yes, laser engraving is highly durable because the design is etched directly into the fabric surface. Unlike printed designs, it will not peel or crack and is suitable for frequently washed clothing.
Q4. Is laser engraving clothing safe to do indoors?
It can be safe if proper precautions are followed. Always:
- Use protective goggles
- Ensure good ventilation or use an air purifier
- Avoid engraving unknown synthetic materials
For UK home users, maintaining airflow in enclosed spaces is especially important.
Q5. What is the best laser engraver for clothing beginners?
For beginners in the UK, diode-based laser engraving machines such as LP2 Plus, LP4, and LP5 are popular choices for clothing engraving projects. They are easy to operate, cost-effective, and suitable for a wide range of clothing materials including cotton, denim, canvas, and leather.
For users who plan to work on larger garment areas or want more flexibility for full-size clothing layouts, the LX2 is also a strong beginner-friendly upgrade option thanks to its 500 × 305 mm working area, which allows larger clothing pieces to be engraved in a single setup without repeated repositioning.
This makes the LX2 especially suitable for hobbyists and small apparel customisation projects in UK home workshops or creative studio environments.
Q6. How long does it take to laser engrave clothing?
Most clothing engraving projects take just a few minutes, depending on the design size and complexity. Simple logos or text can often be completed very quickly, making it ideal for both personal and small business use.
Conclusion
Laser engraving brings a new level of personalisation to clothing, combining precision, durability, and creative freedom in a single process. Whether you're a beginner experimenting with custom T-shirts at home or a UK-based small business looking to create distinctive branded apparel, this technique delivers professional-quality results with minimal effort.
By understanding how the process works, selecting the right machine, and following best practices, you can transform everyday garments into unique statement pieces. From denim and sportswear to leather goods, clothing laser engraving allows you to create designs that truly stand out.
As more creators and small businesses across the UK adopt this technology, it's clear that laser engraving is not just a trend—it's a powerful tool for modern fashion and personalised design.





