















































"Has anyone ever tried laser cutting plywood?"
In this guide, we'll explore plywood laser cutting from start to finish, helping beginners understand the full process with ease. You'll learn how it works, what equipment is needed, and how to get started confidently.
We'll also walk through a practical example—creating a laser-cut plywood door hanger sign—so you can see how everything comes together in a real project. Let's get started on this creative journey!

In this article:
Part 1: Overview of Plywood Laser Cutting
1.1 What is Plywood Laser Cutting?
Plywood laser cutting—often referred to as laser cut plywood—is a precise and efficient technique used to shape plywood into detailed designs, lettering, and custom components. It's widely used by hobbyists, makers, and small businesses for creating clean, professional-looking results.
1.2 How Does Laser CutingWork on Plywood?
"Can plywood be cut with a laser?"Absolutely.
Laser cutting plywood works by directing a highly focused laser beam onto the surface of the wood. The heat generated by the beam burns or vaporises the material along a predefined path, producing accurate and consistent cuts.
Because the laser is guided by computer software, it can handle highly intricate and complex designs with ease. Compared to traditional wood cutting methods, laser cutting delivers:

- Smoother edges with minimal post-processing
- High precision for detailed patterns
- A narrow kerf width for cleaner finishes
This makes it an excellent choice for decorative pieces and precision projects.
1.3 What is Laser Cutting Machine for Plywood?
To cut plywood effectively and safely, you'll need a dedicated laser cutting machine for plywood. These machines simplify the cutting workflow while maintaining consistent accuracy, making them ideal for model making, signage production, craft projects, and small workshop fabrication tasks across the UK.
There are several types of laser cutters available today, including diode, CO₂, and fibre laser systems. A common question from beginners is: What is the best laser for cutting plywood? or Which machine should I choose for home use?
The answer depends mainly on material thickness, available workspace, and production frequency. For home users and small-scale workshop environments in the UK, diode-based machines such as LP5, LP4, and LX2 are often the most practical solutions.
These diode-based plywood laser cutting machines are:
- Easy to operate, even for beginners
- More affordable than many industrial CO₂ alternatives
- Well suited for light to medium plywood cutting tasks
- Compact enough for home workshops and studio desks
Among these options, the LX2 is especially suitable for users who need stronger cutting capability together with a larger working area. With a 500 mm × 305 mm working area, it supports cutting larger plywood sheets without frequent repositioning, which improves workflow efficiency when producing signage panels, craft components, or model structures.
When equipped with higher-power diode modules, the LX2 can handle thicker wood materials in a single pass:
- 60W diode module → up to 25 mm wood (single pass)
- 40W diode module → up to 22 mm wood (single pass)
- 20W diode module → up to 12 mm wood (single pass)
This makes the LX2 a strong choice for UK users producing layered plywood décor pieces, structural craft models, or small-batch workshop components where both cutting depth and workspace flexibility are important.

💡 Case Study: Create a Laser-Cut Plywood Door Hanger Sign in 5 Steps
Preparation checklist for laser cutting plywood:
- Material: 3 mm Plywood Sheet
- Machine: Diode Laser Cutter
- Design: Letters, shapes, or custom graphics
Creating a plywood door hanger sign with laser cutting is simpler than you might expect. Wondering how long it takes? In most cases, you can complete a project like this in around 30 minutes by following these five straightforward steps.
Step 1: Choose Your Material - Plywood Sheet
Selecting the right plywood is essential for achieving clean and precise cuts. Different materials require different laser settings, so always match your setup accordingly.
Also, ensure the plywood is laser-safe to avoid potential hazards during the cutting process.
In this example, we'll focus on creating a plywood door hanger sign.

Step 2: Choose the Right Laser Cutting Machine
For this project, the LaserPecker 4 (LP4) is a reliable choice, particularly for detailed plywood cutting and precision work.
Alternatively:
- LP5 is another excellent option, offering strong performance for wood cutting (up to around 20 mm) as well as wood embossing, making it suitable for both functional and decorative applications.
- LaserPecker LX2 provides higher power options (20W / 40W / 60W), making it ideal for larger-scale projects and thicker wooden materials. Its cutting capability includes:
- 60W diode: up to 25 mm wood (one pass)
- 40W diode: up to 22 mm wood (one pass)
- 20W diode: up to 12 mm wood (one pass)
Step 3: Prepare Your Cutting Design
You can use a graphic design app/software such as LaserPecker Design Space or third-party tools like Photoshop to create or import your design.
Keep these factors in mind:
- Size and proportions
- Shape and layout
- Level of detail
Tip:You can explore LaserPecker CraftZone for inspiration or purchase laser cut wood files online to save time and get ready-made designs.
Step 4: Set up your Laser Cutting Machine
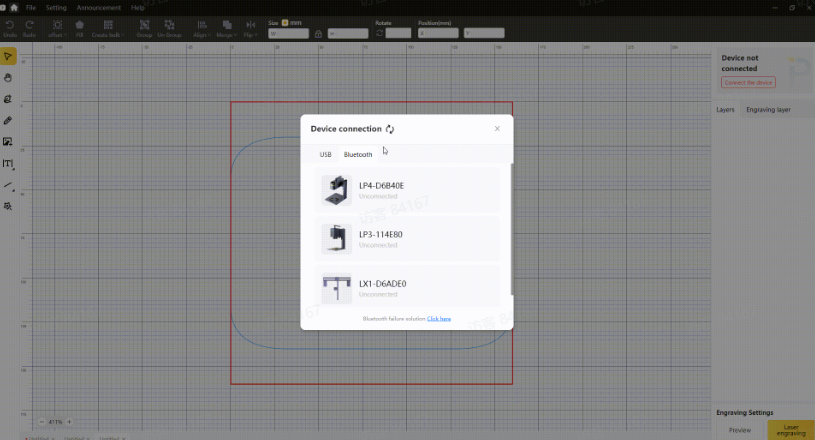
- Power on your machine and connect it via Wi-Fi, USB, or Bluetooth
- Open the design software and upload your file (JPG, PNG, SVG, G-code supported)
- Position your design within the working area and enable preview mode
- Adjust focus and ensure alignment with the plywood surface
- Fine-tune settings such as power, speed, and resolution
For best results with plywood on the LaserPecker 4 (LP4), recommended settings include:
- 10W 450nm diode laser
- Resolution: 2K
- Power: 100%
- Depth: 90%
- Pass: 1
Step 5: Start Cutting Your Plywood
Before starting, double-check your setup to avoid errors. Then begin the process and monitor the machine as it cuts your design with precision.
Safety tips:
- Always wear goggles or use a protective cover
- Use air purifier to reduce smoke and odours
- Ensure good ventilation, as cutting may produce fumes
FAQs: Hot Questions about Plywood Laser Cutting
1. Can you laser cut plywood at home?
Yes, you can laser cut plywood at home using a compact diode-based laser cutting machine for plywood such as the LaserPecker 4 (LP4), LP5, or LX2. These machines are beginner-friendly and well suited for small workshop setups across the UK.
For users working with thicker plywood sheets or larger project layouts, the LX2 is especially practical thanks to its 500 × 305 mm working area and higher cutting capacity. With upgraded diode modules, it can cut significantly thicker wood in a single pass, making it suitable for craft production, signage panels, and layered plywood models created at home.
Compact desktop laser cutters like these are ideal for indoor creative workspaces where space efficiency and ease of setup are important considerations.
2. What type of plywood is best for laser cutting?
High-quality plywood with consistent layers, such as birch plywood, is often preferred. It produces cleaner cuts and reduces the risk of uneven burning.
3. How thick plywood can a laser cutter cut?
This depends on the laser cutter's power level and module type. For example, the LP5 can cut up to 20 mm basswood under optimal conditions, while most desktop diode laser cutting machines are typically ideal for thinner sheets such as 3–6 mm plywood for clean and efficient results.
For users who need stronger cutting performance at home or in small workshops, the LX2 offers significantly higher capacity when equipped with upgraded diode modules:
- 20W module → up to 12 mm wood (single pass)
- 20W module → up to 12 mm wood (single pass)
- 20W module → up to 12 mm wood (single pass)
This makes the LX2 a practical option for cutting thicker plywood panels used in signage making, layered craft production, and structural model-building projects in UK workshop environments.
4. Is laser cutting plywood safe?
Yes, as long as proper precautions are taken. Always wear goggles, ensure good ventilation, and consider using an air purifier to minimise smoke and fumes.
5. Why does plywood sometimes burn or char during laser cutting?
Burn marks can occur due to high power settings, slow speed, or poor material quality. Adjusting the settings and using better-quality plywood can help reduce charring.
6. Do I need special software for laser cutting plywood?
Yes, you'll need a graphic design app/software to create or import your designs. Options include LaserPecker Design Space or tools like Photoshop and Illustrator.
Conclusion
In summary, plywood laser cutting is a versatile and precise technique that allows you to transform standard plywood into detailed designs and functional items with clean edges and fine patterns.
Whether you're a hobbyist, small business owner, or DIY enthusiast, it opens up a wide range of creative and practical possibilities—from personalised décor to small-scale production projects.





